How to Create a Custom Temporary Email Alias Instantly
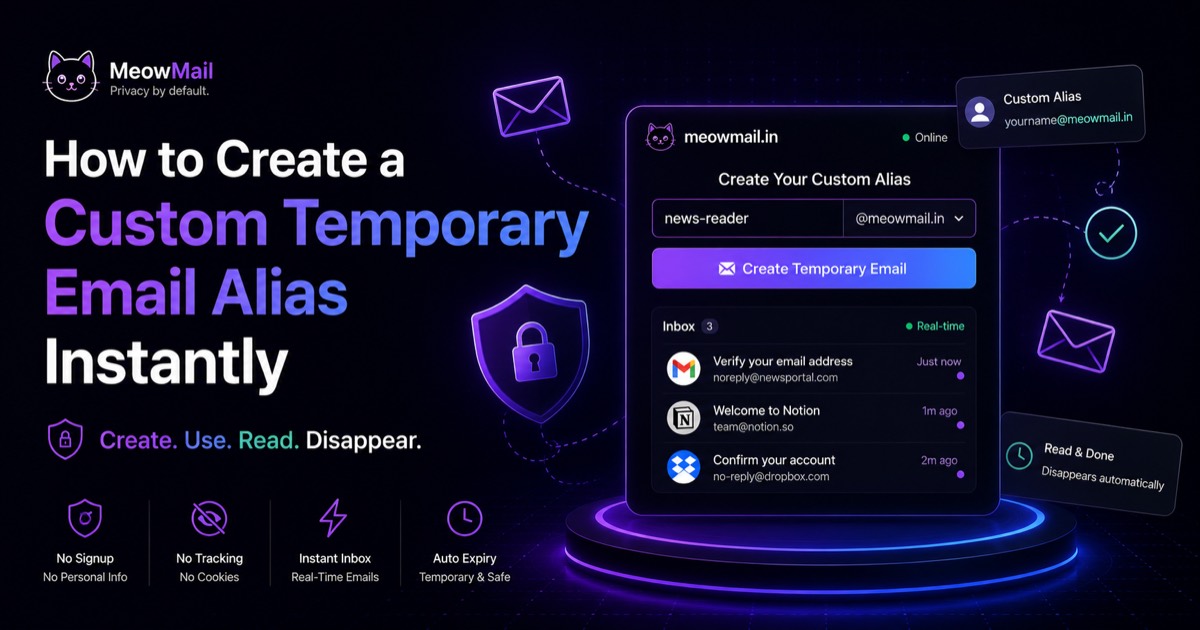
Mark sits at his kitchen table. He stares at a mandatory registration form to read a single news article. He knows typing his primary address guarantees a flood of promotional spam. He refuses to surrender his privacy for a five-minute read. Instead of backing out, he types a custom name into a generator. He reads his article. He vanishes without a trace.
What You'll Achieve
By the end of this tutorial, you will create a temporary email alias that protects your primary inbox. You will secure a working, zero-tracking disposable address with a specific name you choose. You will bypass forced signups instantly. You will receive real-time verification emails safely. You will understand how local browser storage replaces invasive server-side tracking. You will take back control of your digital identity.
Before You Start
Before you create temporary email alias addresses, ensure you have the right setup. The requirements are strictly minimal by design.
- A modern web browser. Use Chrome, Firefox, Safari, Edge, or Brave. Desktop or mobile versions both work perfectly.
- An active internet connection. You need this to receive emails in real-time.
- Zero personal information. You do not need a password. You do not need a phone number. You do not need a primary email.
- Time estimate: Less than 30 seconds from start to finish.
- Understanding of the platform. Meowmail is built by maski.dev with a strict privacy-first mission. There is absolutely no tracking. There is no logging. Your data is not monetized.
- Knowledge of inbox lifespan. Disposable emails here are truly temporary. They last until you clear your local browser data or the server periodically flushes auto-expiring messages. They are not meant for permanent storage.
Step 1: The Privacy-First Portal Eliminates Friction
Every secure process starts with a clean environment. You need to navigate to the main application interface. This platform is engineered specifically to eliminate the friction of traditional email creation.
There are no landing pages demanding your data. There are no tracking scripts monitoring your cursor movements. There are no third-party analytics harvesting your IP address.
The moment the page loads, the system is ready. You do not have to click through privacy policies you will never read. You do not have to opt out of aggressive marketing cookies. You simply arrive and execute your task.
This is the core philosophy of true internet privacy. Tools should serve the user, not the data broker.
- Open your preferred web browser on any device.
- Type
meowmail.ininto the address bar. - Press Enter to load the application.
- Look at the center of the screen for the address generation box.
- Verify that no login prompt or registration form appears.
If you see a form asking for your first and last name, you are in the wrong place. True temporary email requires zero input from you.
✅ Check: The Meowmail homepage loads instantly, displaying a clean interface with an immediate option to generate an inbox.
Step 2: Custom Aliases Provide Better Control
This is where you take control of your digital identity. Most disposable email services force you to use a confusing string of random characters. They give you something unreadable like xkq9284j@domain.com.
That makes it impossible to remember your address if you accidentally close the tab. Here, you get to create temporary email alias names that actually make sense to you.
Choosing a custom prefix helps you organize your disposable tasks. If you are testing a software deployment, you can name it qa-test-deploy. If you want a quick discount code from a retailer, you can name it sneaker-discount. If you are signing up for a forum, use gaming-forum-throwaway.
This flexibility is crucial when you learn how to avoid spam emails effectively. You dictate the terms of the interaction. You decide what the address looks like.
- Locate the text input field labeled for custom prefixes.
- Click inside the text box to activate the cursor.
- Type your desired custom name.
- Use only lowercase letters, numbers, and hyphens.
- Keep it memorable but unique to your current task.
- Avoid using your real name.
- Do not include any identifying personal information.
| Feature | Random String Alias | Custom Temporary Alias |
|---|---|---|
| Memorability | Impossible to remember | Easy to recall instantly |
| Context | None provided | Matches your specific task |
| Professionalism | Looks like obvious spam | Looks like a legitimate user |
| Ease of Use | Requires constant copy-pasting | Can be typed manually from memory |
✅ Check: Your chosen custom name sits in the input field, ready for activation without any error messages about invalid characters.
Step 3: Instant Generation Shields Your Identity
Now you will lock in your choice and activate the inbox. When you create temporary email alias addresses on this platform, the backend provisions the routing instantly.
There is no database saving your IP address. There is no server associating this alias with your physical location. The infrastructure only cares about routing the current incoming message.
Once you click the button, the address goes live immediately. You are now shielded from data brokers. You are protected from list sellers. You have a barrier between the public internet and your private life.
The privacy-first mission ensures this process remains frictionless. You ask for an inbox, and you get one. No questions asked.
- Review your typed custom prefix for typos.
- Ensure you have not included spaces or special symbols.
- Click the "Generate" or arrow button next to the input field.
- Watch the interface transition to your active inbox view.
- Locate the full email address displayed prominently at the top of the screen.
- Click the "Copy" icon next to the address to save it to your device's clipboard.
You now have a fully functional email address. You can paste this into any registration form. You can use it for newsletter signups. You can drop it into file download gateways.
✅ Check: The screen displays your new custom email address and an empty message list below it.
Step 4: Web Sockets Enable Real-Time Delivery
Temporary email works differently than permanent providers like Gmail or Outlook. You do not need to constantly refresh the page.
The application uses web sockets to push incoming messages directly to your screen. The second an email hits the server, it appears in your browser.
You must keep the browser tab open while you wait for the sender to dispatch their message. If you are waiting for a password reset, it usually arrives within ten seconds. If you are waiting for a verification link, it is nearly instantaneous.
Some corporate services delay their automated emails. Be patient. The connection remains active as long as the tab is open.
- Paste your copied custom alias into the third-party website's form.
- Submit the form on their end.
- Switch back to your Meowmail browser tab.
- Do not click the refresh button on your browser.
- Keep your hands off the keyboard.
- Wait for the new message to appear automatically in the list.
- Click on the subject line to open and read the email.
This real-time delivery is a core component of temporary email without registration. It respects your time. It eliminates the anxiety of waiting for a code.
✅ Check: A new email row appears in your inbox list without you having to reload the web page.
Step 5: Local Storage Replaces Server-Side Tracking
Sometimes you need to return to an inbox after closing the tab. Perhaps a service requires a secondary verification step an hour later. Perhaps you accidentally closed your browser.
Meowmail handles this through local storage rather than server-side tracking. Your browser remembers the inboxes you generate. The server does not.
This is a critical distinction for your privacy. It gives you the convenience of history without the surveillance of an account. The architecture ensures your data stays on your machine.
You can create temporary email alias addresses today, and return to them later. As long as the auto-expiring messages have not been purged from the server, you can access them again from the same device.
- Open a new tab and return to the main application page.
- Look for the "Recent Inboxes" or "History" section on the interface.
- Identify your previously created custom alias in the list.
- Click on that specific alias name.
- View the retained messages.
If you clear your browser cookies, this local history will vanish. If you use incognito mode, it will disappear when you close the window. That is exactly how it should work.
✅ Check: Clicking a previous alias from your history immediately loads that specific inbox and its active messages.
Step 6: Manual Deletion Secures Your Session
The final step in using a disposable inbox is abandoning it properly. While emails auto-expire and the server retains no logs, you might want immediate closure.
You can manually delete the session to ensure no one else using your device can view the messages. This is especially important if you are using a shared computer at a library. It is crucial if you are on an office network.
You control the lifecycle of the inbox. When you are finished with your task, you wipe the slate clean. You leave no trace behind. You ensure absolute privacy.
- Locate the "Delete" or "Trash" icon near your active email address.
- Click the icon.
- Confirm the deletion if prompted by the interface.
- Verify that the interface returns to the default generation screen.
- Close the browser tab.
Your custom inbox is now detached from your session. The data is gone. You successfully protected your primary identity.
✅ Check: The active inbox view disappears, and you are back at the starting screen with no visible message history for that session.
Step 7: Auto-Expiration Ensures Absolute Privacy
You must understand what happens to your data after you leave. Temporary email is not designed for permanent storage. It is designed for ephemeral transactions.
The infrastructure relies on strict auto-expiration. Emails arrive, they serve their purpose, and they vanish.
There is no archive feature. There is no backup server. Once an email expires, it is permanently deleted from the system. This strict no-logs policy is what keeps you safe from data breaches.
Do not use these addresses for critical accounts. Do not use them for banking. Do not use them for primary social media profiles.
- Read your verification code or download your file.
- Save any necessary information locally to your computer.
- Accept that the email will disappear shortly.
- Never rely on a disposable alias for password recovery of important accounts.
By embracing the temporary nature of the tool, you maximize its utility. You get in, you get verified, and you get out.
✅ Check: You have successfully extracted the necessary information from the email and saved it elsewhere before the message auto-expires.
Troubleshooting
The Verification Email Never Arrives
You submitted the form, but your inbox remains empty. This usually means the sending service has a delay in their outbound mail queue. It can also mean the service flagged the registration. Wait at least three minutes. Do not refresh the page, as the web socket connection will push the email automatically. If it still fails, try requesting the verification email again from the third-party site.
The Custom Alias Returns an Error
You typed a name, but the system refused to generate the inbox. This happens when you use unsupported characters. Custom aliases only support standard alphanumeric characters and hyphens. Remove any spaces, periods, underscores, or special symbols like exclamation points. Stick to simple formats like test-account-123 and try generating it again.
You Lost Access to the Inbox
You closed the tab and cleared your browser cache, and now you cannot find your verification code. Because the platform enforces a strict no-logging policy, that inbox history was only saved locally in your browser. Once the cache is cleared, the link to that session is severed permanently. You will need to generate a new disposable alias and restart the registration process on the third-party site.
The Website Blocked the Email Address
You pasted your new custom alias, but the website said "Please enter a valid email." Some aggressive platforms attempt to block known disposable email domains. If this happens, you cannot force them to accept it. You must wait for the platform to rotate its available domain names. Alternatively, you can use the alias on platforms that respect user privacy and do not enforce draconian domain filters.
The Email Contains Broken Links or Images
You opened the message, but the formatting is destroyed and the buttons do not work. Temporary email services often strip out complex HTML and tracking pixels to protect your privacy. This sanitization process can sometimes break poorly coded emails. Look for a plain text link within the message body. Copy that raw URL and paste it directly into your browser's address bar to complete your verification.
What to Do Next
You now know exactly how to create a custom temporary email alias and protect your primary inbox from spam. Stop giving your real email address to untrusted websites. Audit your password manager to see how many useless accounts are tied to your permanent email. Start migrating those low-tier logins to temporary aliases immediately to drastically reduce your digital footprint. Take control of your inbox today.
Try MeowMail free
Generate a private, disposable inbox in one click. No signup, no tracking.
Get a temporary inbox